Rye Crackers with Caraway Recipe

Rye Crackers
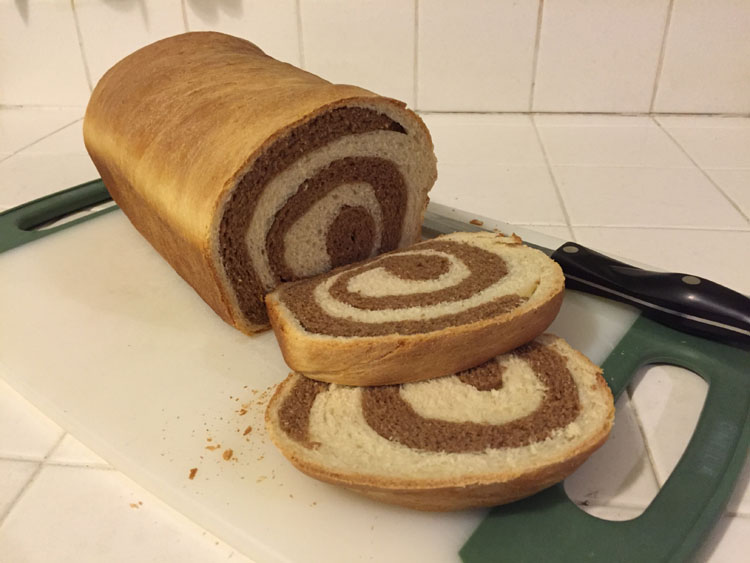
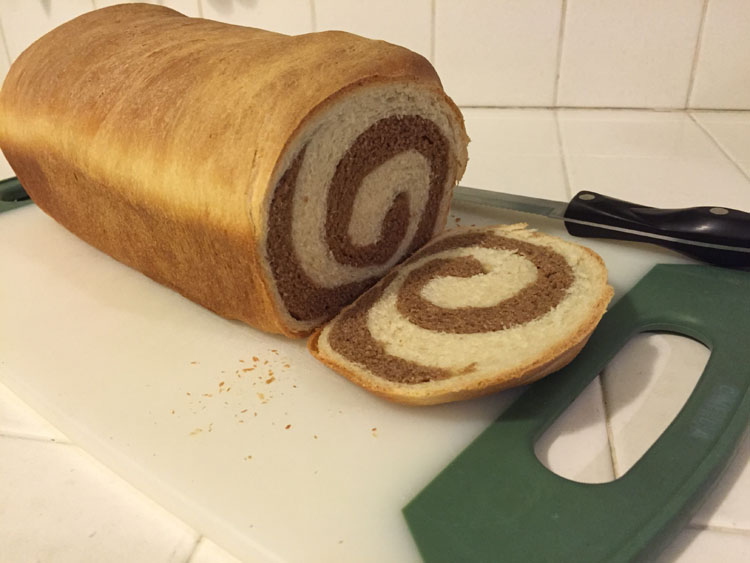
I love rye crackers and since I still had some leftover rye flour from my swirled rye bread adventure I decided to bake some! I did some searching online for a recipe and found the perfect one on Food Republic. Head on over there and check out the recipe, it’s also a great foodie website so explore!
Rye Crackers Ingredients
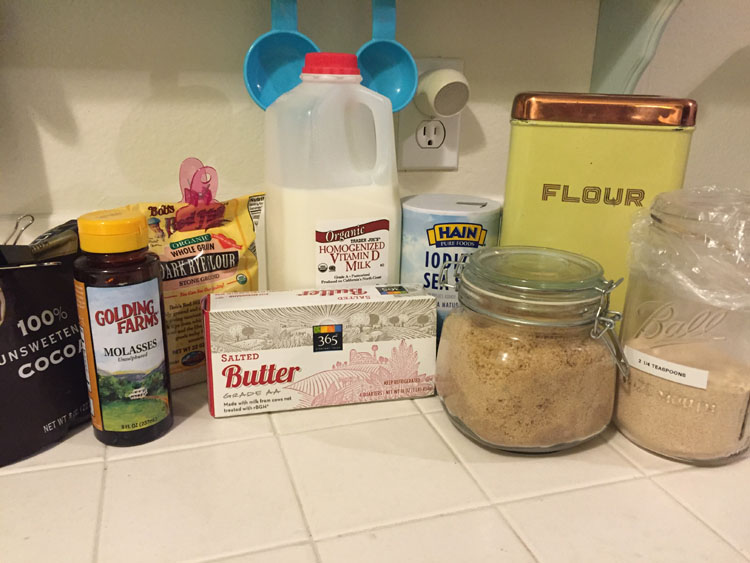
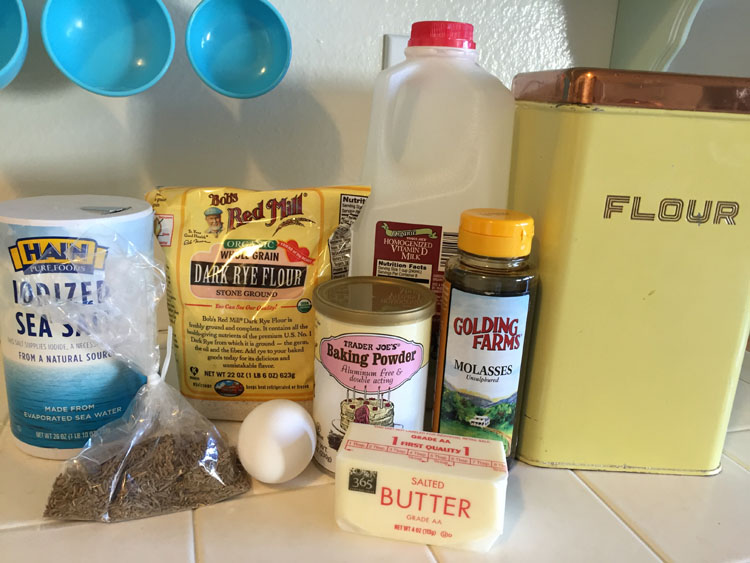
One thing I’ve learned from my baking and cooking escapades is to always get your ingredients ready before you start, especially if it’s a new recipe. That way you don’t have any surprises or find out you’re out of baking powder while you’re in the middle of things.
Spice Grinder
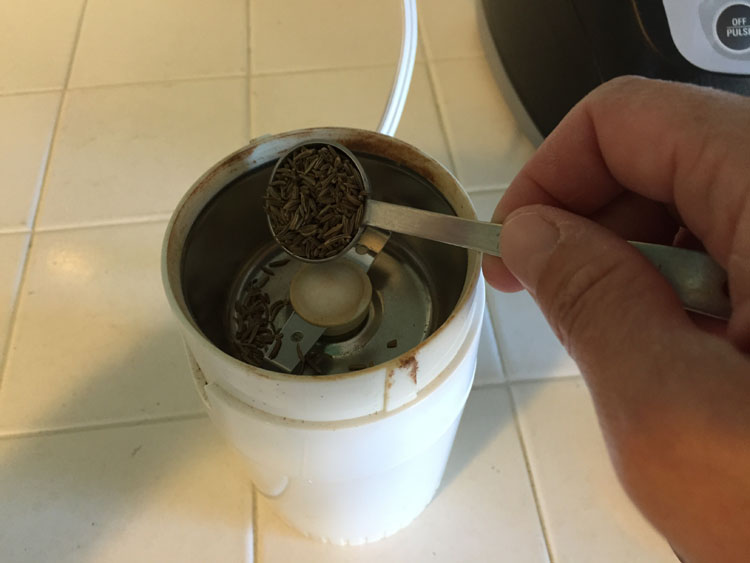
This recipe calls for ground caraway. I have a coffee grinder that I use exclusively for grinding spices. I added a few teaspoons of caraway seeds and ground those babies up! A good tip for cleaning out your grinder after using it is to run some uncooked white rice through it. Then just wipe it out with a paper towel and your caraway won’t end up tasting like the cardamom pods you ground up last time.
Ground Caraway
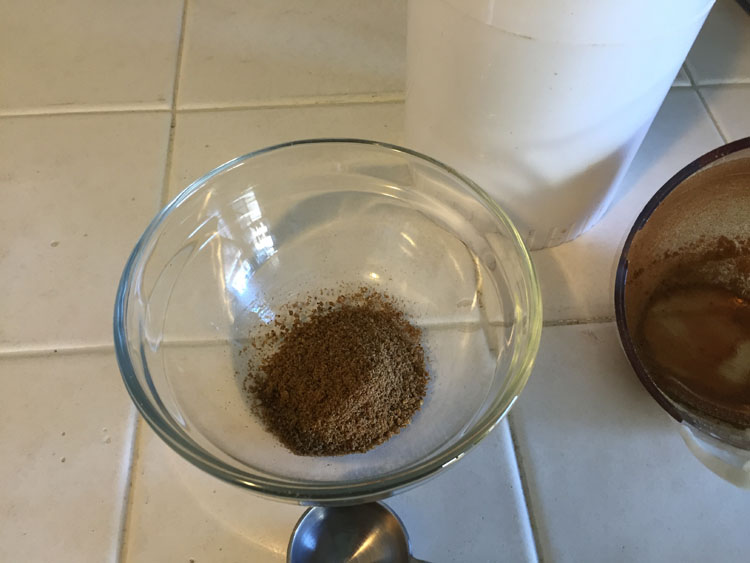
Perfectly ground caraway!
Dry Ingredients
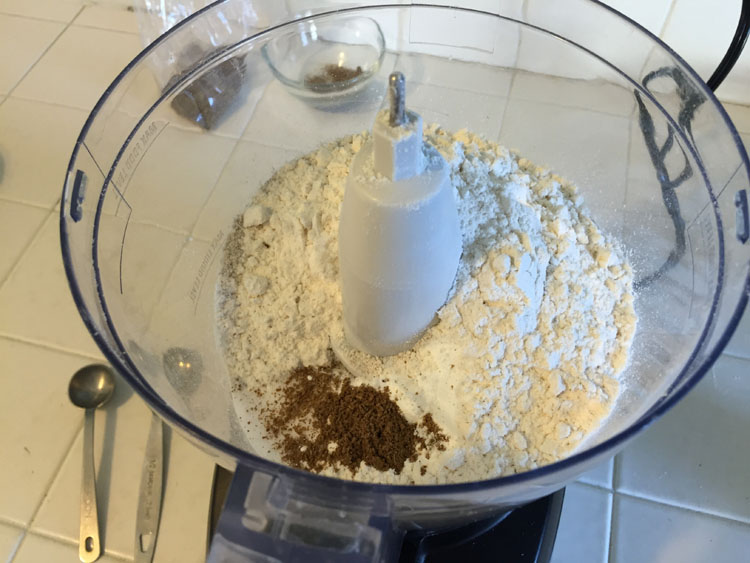
All the dry ingredients go in a food processor.
Cubed Butter
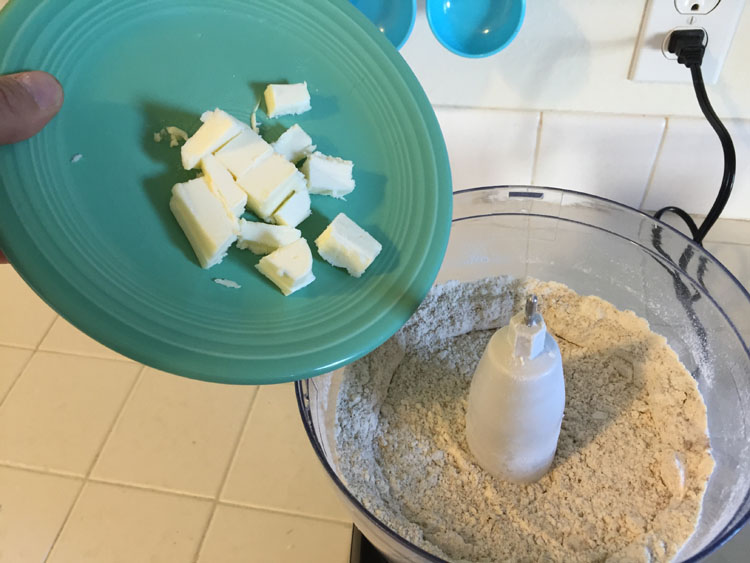
Add in the cubed butter and pulse until it looks like fine crumbs.
Wet Ingredients
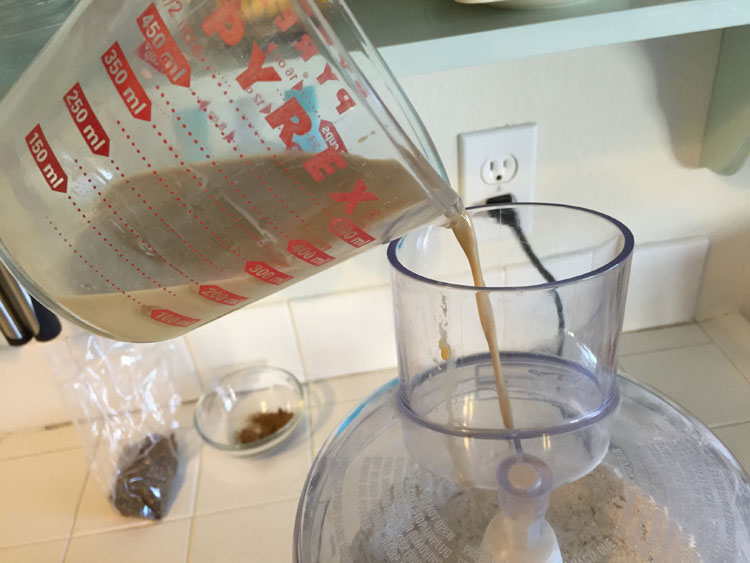
Hello wet ingredients!
Knead the Dough
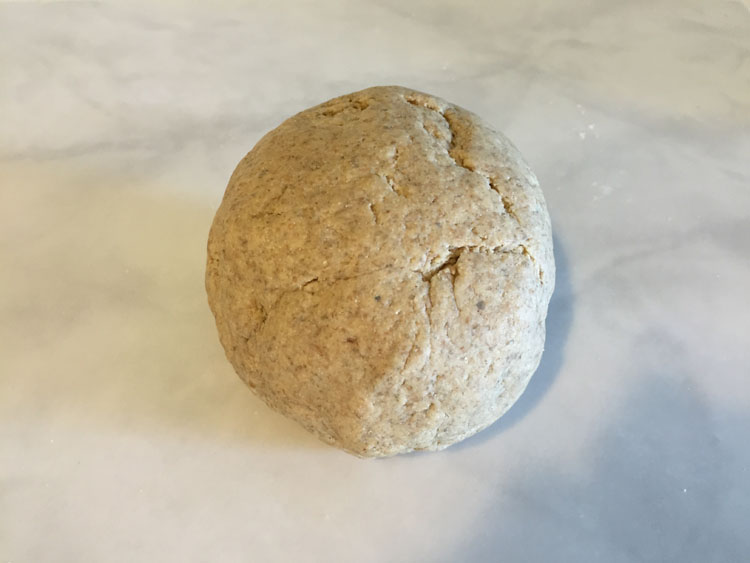
Pulse everything in the food processor, then turn it out and knead until smooth. The dough will need to rest for about 25 minutes.
Pasta Roller
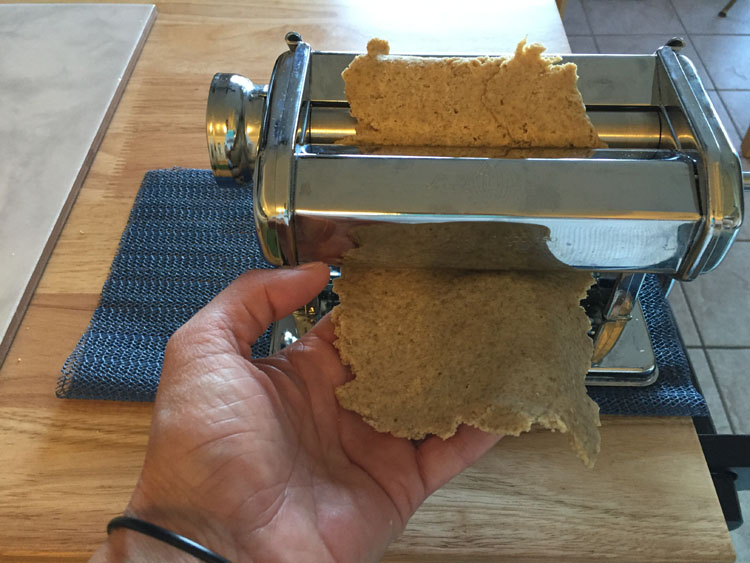
Divide the dough up and run it through a pasta roller. If you don’t have a pasta maker roll it out by hand and work on those arm muscles! You want it to be about 1/16″ thick. I found that I liked the crackers best on the 4 setting for my particular pasta maker.
Rye Cracker Dough
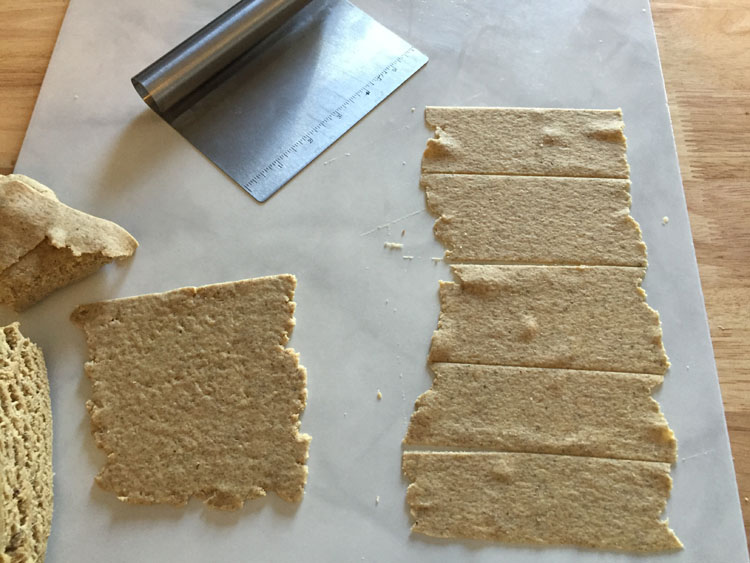
It’s starting to look like rye crackers! I used my pastry scraper to cut my crackers, but you can also use a pizza cutter. I left the ends of my crackers rough, I like the way they look!
Egg Wash
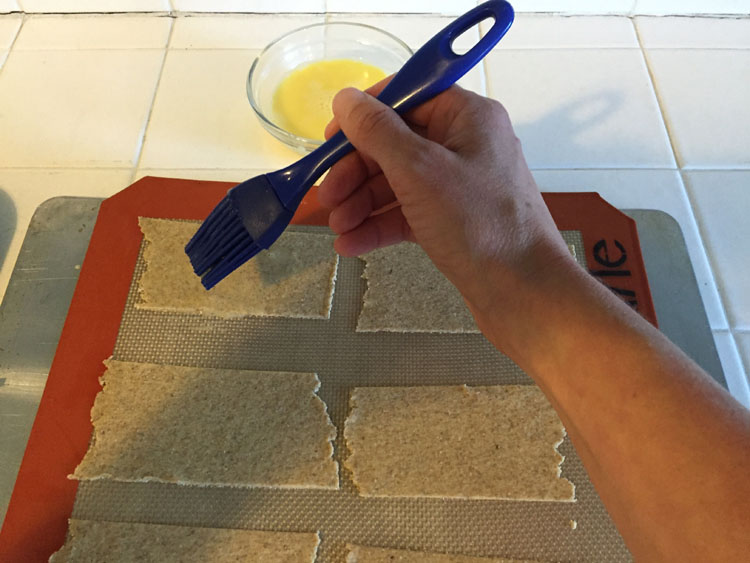
Put the rye crackers on a silicone baking mat, or you can use parchment paper. Brush the tops with an egg wash.
Caraway Seeds
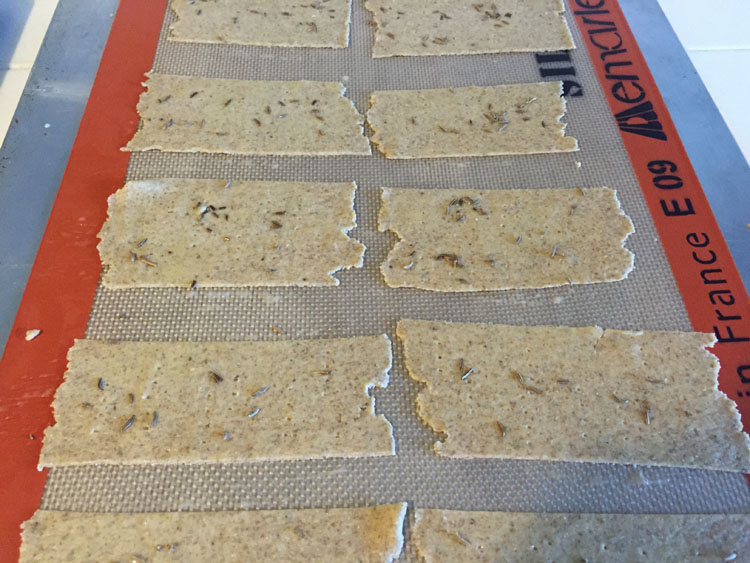
Sprinkle the tops with caraway seeds and press them lightly into the dough. Prick the crackers with a fork.
Baked Crackers
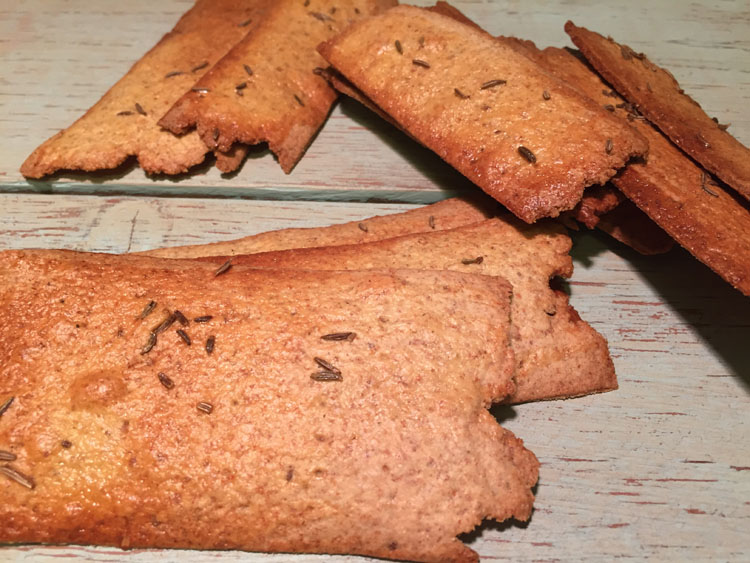
Pop them in the oven and bake until golden brown. When they first come out they will still be a little bit pliable, but after they cool you will have crisp rye crackers!

Rye Bread with a Swirl – Step by Step

Rye BreadThis delicious loaf of rye bread is a real eye catcher when you slice into it! It’s has a hearty crumb and a good crust. This is a recipe from the Better Homes and Gardens New Cook Book that I’ve made several modifications to. I’ve been cooking out of that cook book for nearly 20 years!
ingredientsTo make one loaf you will need:
3 to 3 1/2 cups of all purpose flour
1 package (2 1/4 tsp) active dry yeast
1 1/2 cups milk
1 1/2 tsp salt
2 TBS brown sugar
2 TBS butter
2 TBS dark molasses or cocoa powder
1 1/4 cups dark rye flour

I like to buy my yeast by the pound and keep it in a big jar in the refrigerator. I’ve had this batch of yeast for 2 years now and it’s still working just fine! 2 1/4 teaspoons of yeast equals one envelope.
heating milkAfter you mix 2 cups of the all purpose flour and your yeast in a large mixing bowl it’s time to heat the milk. Combine the milk, salt, brown sugar, and butter in a sauce pan and heat it until it reaches somewhere between 120 and 130 degrees.
add wet to dryAdd the wet to dry ingredients and mix on high speed for 3 minutes, this helps develop the gluten.You should have about 2 1/2 cups of batter, divide it in half.
kneading boardMy kitchen has old tile countertops and I don’t dare try to knead dough on them! I went to Home Depot and bought a large ceramic tile. I place it on top of a non-slip drawer liner I cut to fit and it works perfectly!

dough ballsTo one portion of the batter stir in as much of the remaining all purpose flour as you can, then knead in some more to make a stiff dough that is smooth and elastic. To the remaining batter stir in the cocoa powder or molasses (I used one tablespoon of each!), the rye flour, and as much of the remaining all purpose flour as you can. Knead in more flour as needed to make a stiff dough. Form each dough into a ball, place them in separate bowls that you’ve oiled, cover, and let them rise until doubled. Mine took about 1 hour and 15 minutes.
rolling out the doughPunch down both doughs and roll them out into rectangles about 12 x 8 inches each.
dough on topPlace the dark dough on top of the light one.
roll it upRoll the doughs together beginning at the short side.
loaf panPlace it in a buttered loaf pan seam side down and let rise until nearly doubled.
risen loafMine took about 50 minutes for the second rise. Pop that baby into a 375 degree oven for 30 to 35 minutes! Bread is done when it sounds hollow while tapping on it.
cooling loafNow here’s the hard part! Let your rye bread cool for at least an hour before slicing it. I know it’s tempting, but I find that slicing bread too early crushes it and the slices come out a bit doughy.
pretty sliceAnd now the big moment! Slice into your loaf of swirled rye bread and impress your friends and family!

KitchenAid Mixer Bowl Hack

The other day when I was baking my first cake I noticed my KitchenAid mixer hadn’t mixed everything completely! At the bottom of the bowl there was still chunks of butter and sugar that hadn’t incorporated into the mixture. I ended up having to mix by hand and I still had a few chunks when I poured the batter into the cake pans. After a quick Google search I learned about the dime test. Place a dime in the concave area in the bottom of your mixing bowl, attach it to the mixer and run it with the flat beater. The beater should contact the dime and move it 1/4 of an inch or so each time it goes around. Mine didn’t even come close! I then learned about an adjustment screw that I’ve never touched since the day I first took my mixer out of the box. This also helps if you find your beater has paint wearing off. That means the bowl of your mixer is too high and the beater is rubbing against it. Here’s a handy video to show you what I’m talking about: KitchenAid Mixer Beater to Bowl Adjustment.

Problem solved, right? Not for me! I adjusted the screw as far as it would go and the beater still didn’t touch the dime. Never fear, I solved the issue! My secret? Washers. Now, this will only work for KitchenAid mixer models that have the bowl-lift, not the tilt head. I placed one washer on each of the bowl pins, readjusted things using the screw and now it works perfectly! Also, if you’re disorganized like me here’s a handy PDF in case you lost your original KitchenAid Mixer Manual. Keeping your tools well maintained is always a good idea!

KitchenAid Mixer Adjustment Screw

KitchenAid Mixer Washer on Bowl Pin Hack

Chocolate Cake for a Beginner

Delicious Chocolate Cake
I want to become a better baker, especially now that the weather is changing and it’s getting cold outside. I’ve baked cakes before, but always from a box mix. I decided it was time to change that! I enrolled in a class on Skillshare called The Art Of Baking: A Beginners Guide. It has lots of good tips and recipes for the basics: cakes, cookies, bread, and pastry. When I finished the class I felt ready for my first chocolate cake. I followed the recipe on the back of a bag of Ghirardelli cocoa powder and frosted it with chocolate buttercream. It was really good! Some things I learned:

  1. Read through the entire recipe before you begin. You don’t want to be surprised by an ingredient or tool you don’t have on hand.
  2. Gather all of your ingredients and tools in one place. This makes it easy to follow a recipe you’re unfamiliar with.
  3. Measure accurately! Baking is like chemistry so accuracy matters.
  4. Make sure your oven temperature is correct, you may need to buy a separate oven thermometer. It took much longer than the recipe called for for my cake to come out, I have a feeling my oven temperature is off.

In the end I found that baking a chocolate cake from scratch really isn’t that much more difficult than a box mix.

Ghirardelli Grand Fudge Cake
2 cups all purpose flour
3/4 cup unsweetened cocoa powder
1 tsp baking powder
1 tsp baking soda
1/2 tsp salt
1 cup softened butter
1 3/4 cup sugar
2 tsp vanilla
2 large eggs
1 1/3 cups milk

Preheat oven to 350 degrees. Grease and lightly flour two 9″ cake pans.

Combine flour, cocoa, baking powder, baking soda, and salt, and set aside.

In a large bowl cream butter and sugar on medium-high speed until light and fluffy.

Reduce speed and add vanilla and eggs one at a time.

Alternately add flour mixture and milk while mixing on low speed. Continue to mix until smooth.

Pour into prepared pans. Bake for 30 to 35 minutes until a cake tester comes out clean.


Related Posts Plugin for WordPress, Blogger...