 When we bought our fixer upper over the summer I knew the threshold was going to need to be replaced. It’s the first thing you see when you walk in the house and it looked gross! There was also a 3/4 inch gap between the bottom of the door and the top of the threshold so it was getting really drafty now that winter was setting in.
 The first thing I did was remove the old threshold. Here you can see how gross it was underneath, not to mention the old termite damage on the door trim. I cleaned up all manner of things including dirt, rust, old tile grout chunks, dog hair and even lentils. Seriously – lentils! I have no idea how those got in there!
 We chose an aluminum and oak threshold for the replacement. It fit perfectly so it didn’t need to be trimmed.
 I was going to have to cut the door trim however. First I made a cardboard template by tracing the side profile of the new threshold. I used this to mark my cut line on both sides of the door.
 I used a coping saw to cut the door trim.
 A chisel helped get the last bits of wood out.
 With the new threshold in place I noted a problem! There was a large gap between where the tile ended and where I wanted the new threshold to be placed.
 I went back to the hardware store and bought a length of oak quarter round trim. I cut it to length and glued it to the new threshold.
 I tried different clamps to hold it in place while it dried, but they all slipped off the round surface. Rubber bands to the rescue!
 After the glue dried I used a wipe on polyurethane to help protect the wood.
 Looking good!
 While the polyurethane was drying I cleaned up the rust from underneath the old threshold and masked it off.
 I sprayed it with Rust-Oleum primer for rusty metal.
 Time to install the new threshold! I cut a piece of scrap wood to use with a rubber mallet to help me tap it into place.
 I drilled holes and used 2 1/2″ screws to hold everything in place.
 I finished by screwing the top piece of the threshold in place.
 I still have to work on the old door trim, but that’s a project for another day!
 What a difference! I also bought a new doormat to put on the tile since rainy season is approaching. Now the first thing you see when you come in my house is a shiny new threshold!
Tag Archives: diy
A Zippered Pencil Bag
My first try at sewing a zipper. It’s came out a little wonky, but I love my new hand woven pencil bag!
Loteria Sketchbook Journal
I have a weird thing about brand new sketchbooks or journals – I get a shiny new one and I’m afraid I’ll mess it up. It then sits in my studio collecting dust until I feel guilty. That’s why I’ve decided to make my own sketchbook! Why not make your own too?
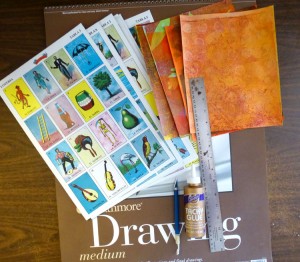
Materials needed: something for the cover – I used Mexican loteria cards, decorative paper for the inside covers – optional, drawing paper for the inside pages, an exacto knife, ruler, glue and a sewing machine.
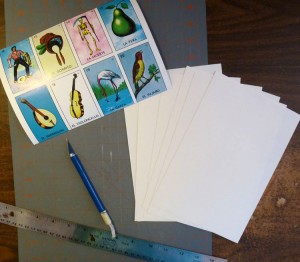
First trim the cover to your desired size, if you are using decorative paper for the inside trim it to the same size and glue the two together. Trim your inside pages so they are about 1/8 of an inch smaller than the cover. I wanted a simple sketchbook that wasn’t intimidating so I only used four pieces of paper which gives me 16 pages.
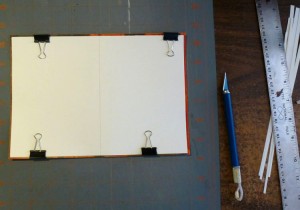
Center and stack the pages on top of the cover; then clamp, paperclip or tape it all together; measure down the middle and draw a line.
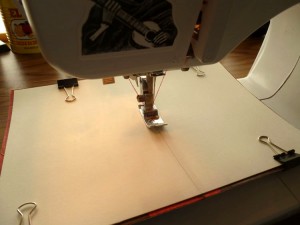
Set your thread tension so it’s very light, then carefully sew down the line your drew. Don’t break your needle! This sketchbook was very light so there were no issues.
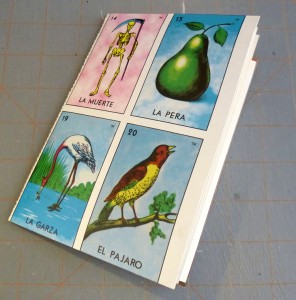
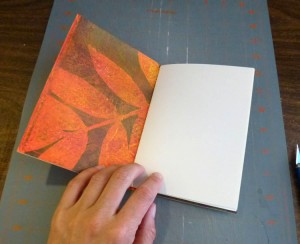
Fold that baby in half and sketch, paint or write with reckless abandon!
Quick Tip – Use Packing Tape for Cutting Felt Shapes
When I was first working with felt I had a heck of a time trying to get the shapes I wanted cut out precisely. I used cardboard cutouts and my trusty rotary cutter for straight lines, but anything else was a pain in the you know what. I tried everything including straight pins and disappearing ink (that didn’t disappear) fabric pens to no avail. Luckily I found this handy tutorial over on Wee Folk Art! All you need is some wide packing tape!
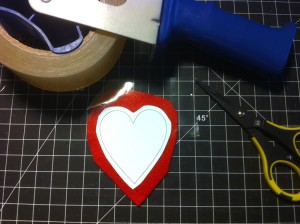
Cut out your paper pattern leaving a little bit of space around the cut line and tape around all the edges on top of your piece of felt.
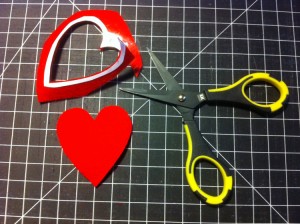
Cut out your shape along the pattern line and admire your perfectly cut felt!

